Getting Started - Prepare Your Environment ## Exercise 1 - Accessing your Kubernetes Cluster ## Exercise 2 - Installing Istio ## Exercise 3 - Deploy Guestbook with Istio Proxy ## Exercise 4 - Expose the service mesh with the Istio Ingress Gateway ## Exercise 5 - Telemetry ## Exercise 6 - Traffic Management ## Exercise 7 - Security
Exercise 1 - Accessing your Kubernetes Cluster
You must already have an IBM account, with a cluster created or assigned to you as documented in the previous step.
Connect to your cluster using the IBM Cloud Shell
For this lab we use the new IBM Cloud Shell (currently in beta) which provides all the necessary tools. Use this web-based shell to perform the tasks in this lab.
-
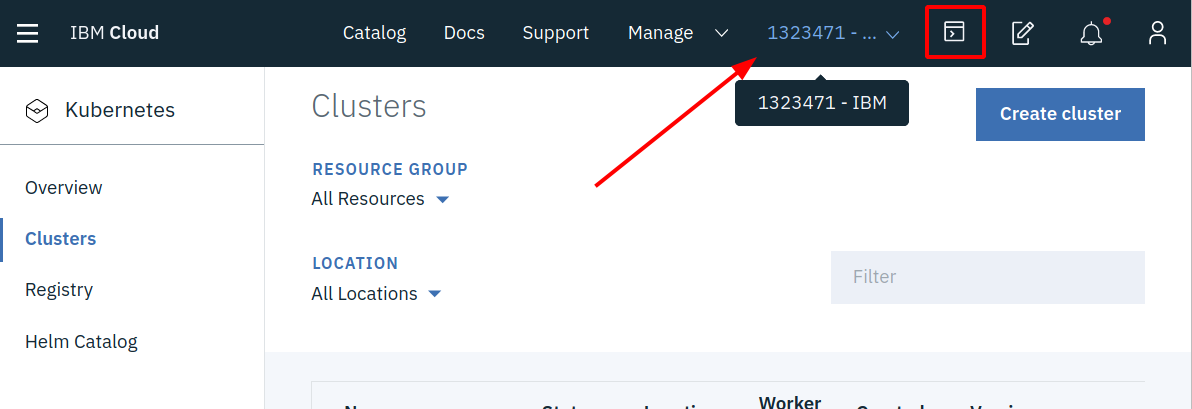
Using Chrome or Firefox, go to the IBM Cloud dashboard, make sure the IBM account is selected, and click on the terminal icon in the menu bar.

Note: IBM Cloud Shell has limits on both continuous and weekly usage. You can use Cloud Shell for up to 4 hours continuously and up to 30 hours in a week. Your sessions close when you reach these limits, and any files or data in your workspace are removed. That is why at certain points throughout this lab we tell you to save some settings in the external environment.txt file (created at the end of the Getting Started) so that you can easily recreate your environment.
Use the IBM Cloud Shell to continue with the labs.
Access your cluster
Learn how to set the context to work with your cluster by using the kubectl CLI, access the Kubernetes dashboard, and gather basic information about your cluster.
-
Set the context for your cluster in your CLI. Every time you log in to the IBM Cloud Kubernetes Service CLI to work with the cluster, you must run these commands to set the path to the cluster’s configuration file as a session variable. The Kubernetes CLI uses this variable to find a local configuration file and certificates that are necessary to connect with the cluster in IBM Cloud.
a. List the available clusters. You should see the cluster you were assigned.
ibmcloud ks clustersb. Set an environment variable for your cluster name:
export MYCLUSTER=<your_cluster_name>Copy this ‘export’ command to your environment file.
c. Download the configuration file and certificates for your cluster using the
cluster configcommand.ibmcloud ks cluster config $MYCLUSTERc. Copy and paste the output export command from the output of previous step and save it in your environment file, too. This will set the
KUBECONFIGenvironment variable and configure yourkubectlCLI to run commands against your cluster. Example:export KUBECONFIG=/tmp/ic/cloudshell-f64391c4-b01c-4537-...yml -
Get basic information about your cluster and its worker nodes. This information can help you manage your cluster and troubleshoot issues.
a. View details of your cluster.
ibmcloud ks cluster get $MYCLUSTERb. Verify the worker nodes in the cluster.
ibmcloud ks workers $MYCLUSTER ibmcloud ks worker get <worker_ID> -
Validate access to your cluster.
a. View nodes in the cluster.
kubectl get nodeb. View services, deployments, and pods.
kubectl get svc,deploy,po --all-namespaces
Clone the lab repo
From your command line, run:
git clone https://github.com/Harald-U/istio101.git
cd istio101/workshop/guestbook/v2
This is the working directory for the workshop.