Prerequisites
1. Create an IBM Cloud Account
We will use pre-provisioned Kubernetes clusters on the IBM Cloud for this workshop. You need an IBM Cloud Account to assign yourself one of these clusters:
-
You can register at https://cloud.ibm.com.
We need your email address, a password, your name, and your country.
During the registration, we will send a verification code to your email address that you have to enter into the registration form.
Registration is free and without any obligations.
-
Logon to the IBM Cloud Dashboard https://cloud.ibm.com.
2. Assign yourself a pre-provisoned cluster
In this step you will assign yourself a pre-provisioned cluster.
-
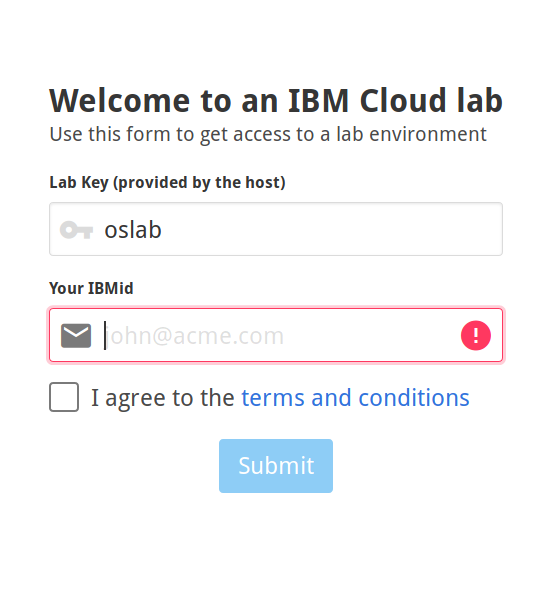
Your lab instructor will provide a link to an application and a “lab key”. Open the application in your browser:
-
Enter the lab key provided and your IBMid (it is the email address you used to register at the IBM Cloud), agree to the T&Cs, and click “Submit”:
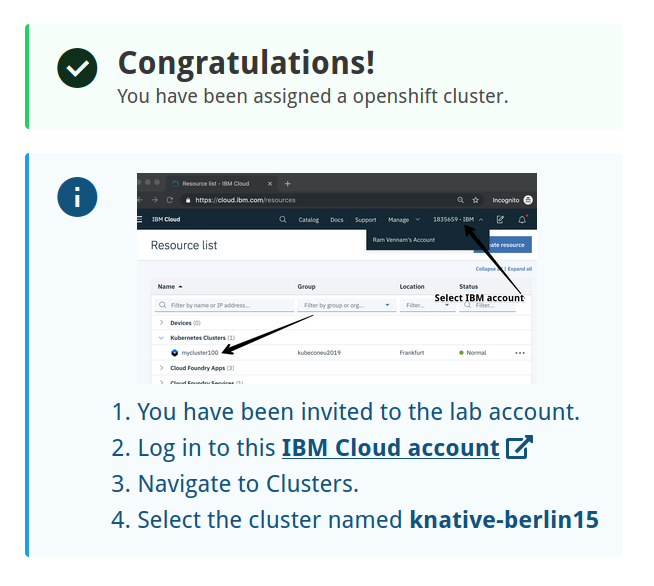
Of course your cluster will be named differently and the lab account you need to select from the pull-down in the IBM Cloud Dashboard is 1840867 - Advowork.
3. Work Environment
To see details about your assigned cluster and access the Kubernetes dashboard follow these steps:
- Go back to the IBM Cloud Dashboard (step 1)
- In the title bar, open the Accounts pull-down menu (you may need to refresh your browser) and select the lab account 1840867 - Advowork:

- Select Kubernetes -> Clusters from the burger menu:
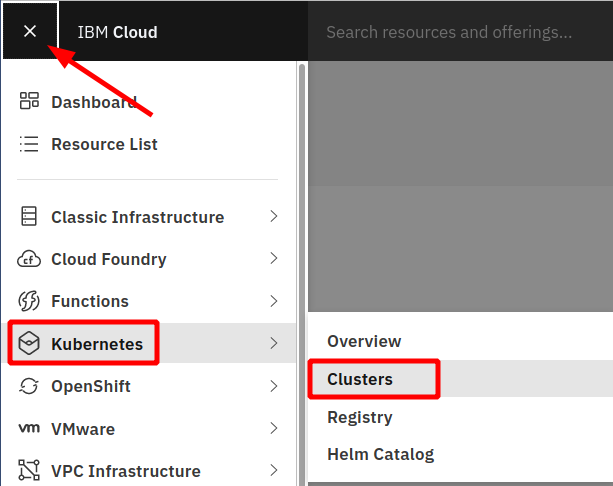
- This will display your list of available cluster with one entry:

- Click on the entry, this displays all the details about your cluster:
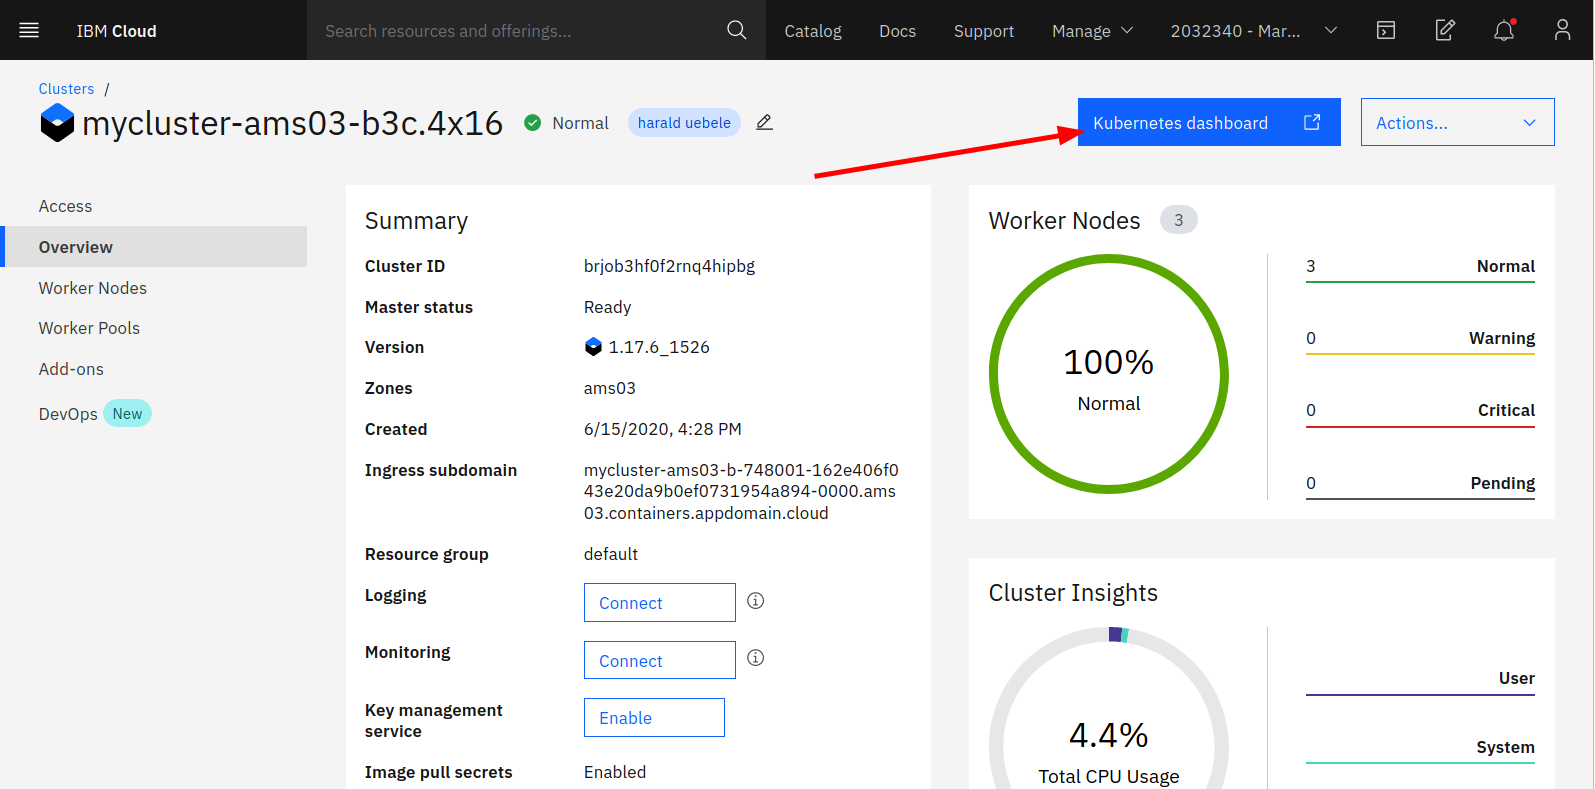
- You can access the Kubernetes dashboard with the blue button.
We will work with the cluster in the command line mostly, using different CLIs. IBM Cloud Shell is a web based shell (terminal) that has all the required tools available.
- Access IBM Cloud Shell using the icon in the title bar. Make sure you are in the IBM account (1840867 - Advowork)!:

- It will take a moment to set up a session. Cloud Shell offers 500 MB of temporary storage, the session will close after 1 hour of inactivity, workspace data will be removed then.
- Enter the command:
ibmcloud ks cluster lsThis should display the name of your cluster, its ID, and a few other things
-
Create an environment variable $CLUSTER_NAME that contains the name of your cluster.
Example:
export CLUSTER_NAME=mycluster-ams03-b3c.4x16 - Download the cluster configuration for ‘kubectl’:
ibmcloud ks cluster config --cluster $CLUSTER_NAME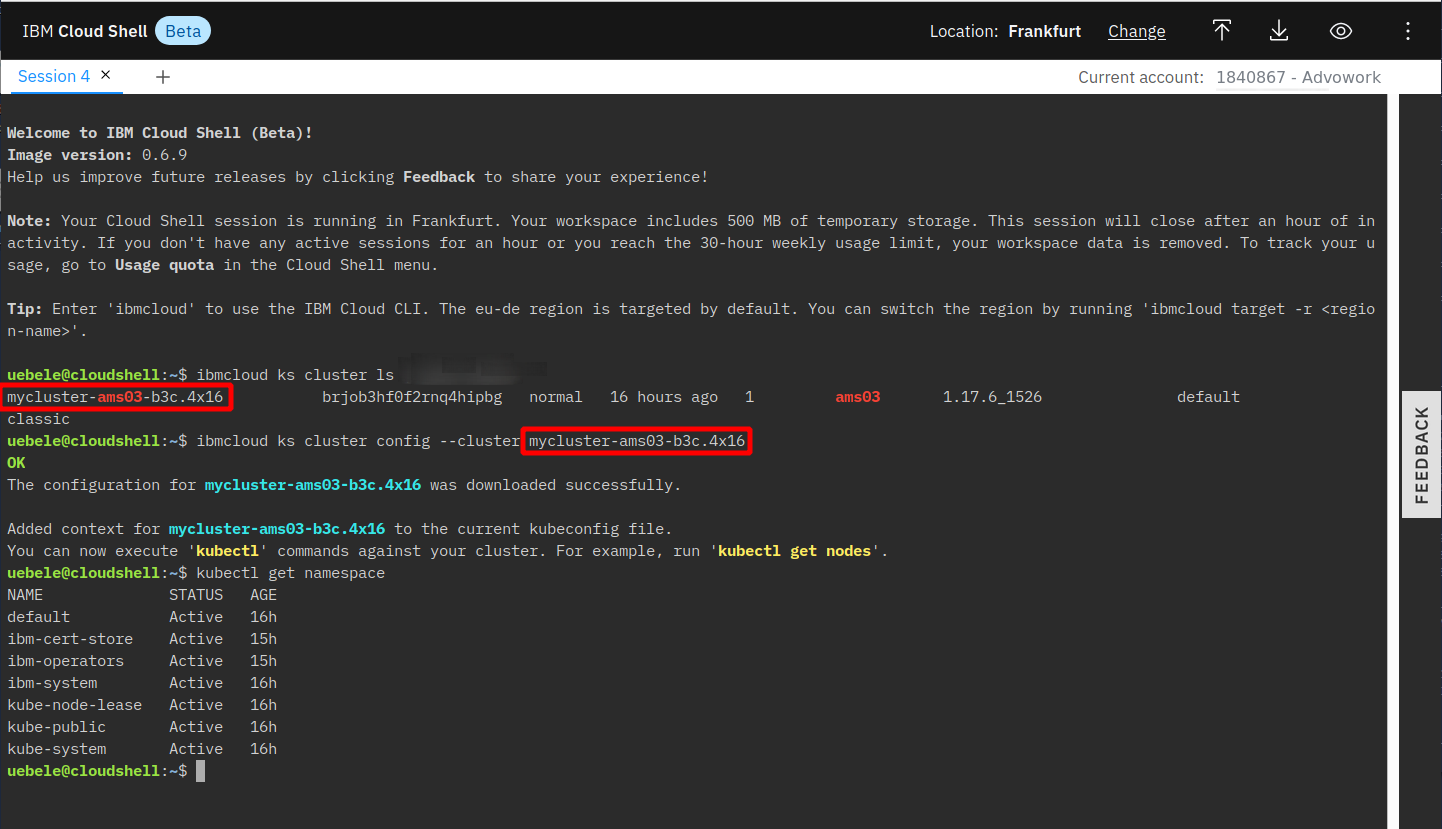
- Test access to the cluster by displaying the available namespaces:
kubectl get namespace
4. Get the code
In your Cloud Shell enter the following command to download the code from Github:
git clone https://github.com/Harald-U/knative-handson-workshop.git
cd knative-handson-workshop/code
Continue with the next part Installing Knative