Security and Microservices
Content:
8 - Authentication in the Vue.js fronted
This is a read-only lab
There are several ways to use Keycloak from web applications. The easiest option is to use the official Keycloak JavaScript client library which is defined as dependency in package.json.
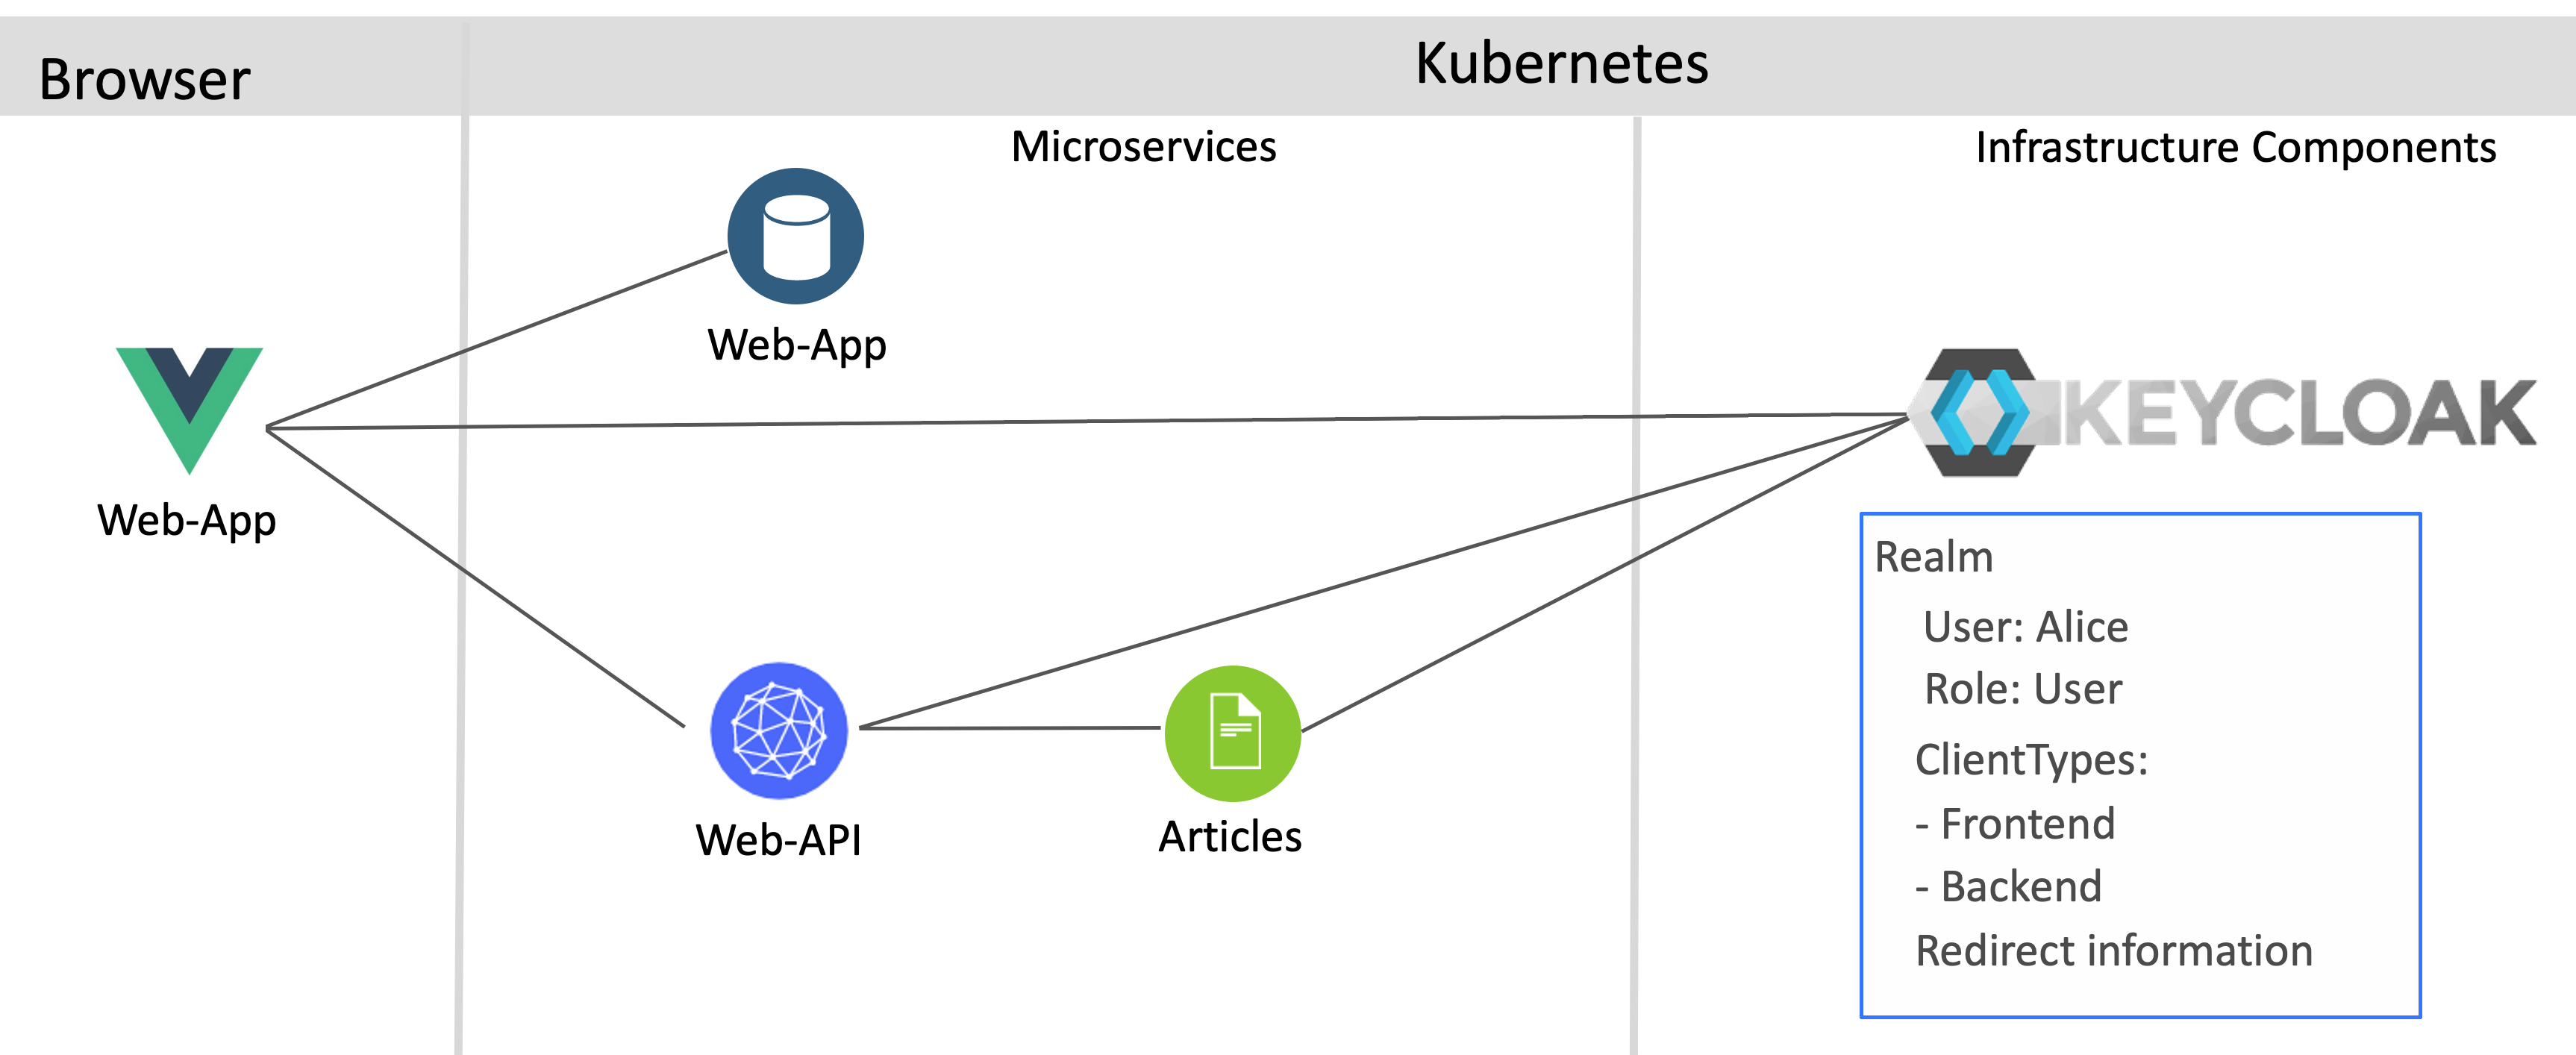
The shows the simplified architecture:
The Vue.js application triggers the authentication directly when the application is opened. See the file main.js:
import Keycloak from 'keycloak-js';

let initOptions = {
  url: 'https://keycloak-default.niklas-heidloff-b3c-4x16-162e406f043e20da9b0ef0731954a894-0000.us-south.containers.appdomain.cloud/auth',
    realm: 'quarkus', clientId: 'frontend', onLoad: 'login-required'
}

Vue.config.productionTip = false
Vue.config.devtools = true
Vue.use(BootstrapVue);

let keycloak = Keycloak(initOptions);
keycloak.init({ onLoad: initOptions.onLoad }).then((auth) => {
  if (!auth) {
    window.location.reload();
  }

  new Vue({
    store,
    router,
    render: h => h(App)
  }).$mount('#app')

  let payload = {
    idToken: keycloak.idToken,
    accessToken: keycloak.token
  }
  if (keycloak.token && keycloak.idToken && keycloak.token != '' && keycloak.idToken != '') {
    store.commit("login", payload);
    console.log("User has logged in: " + keycloak.subject)
  }
  else {
    store.commit("logout");
  }
In order to use the Keycloak API, three pieces of information are required. The Keycloak URL, the realm and the client id.
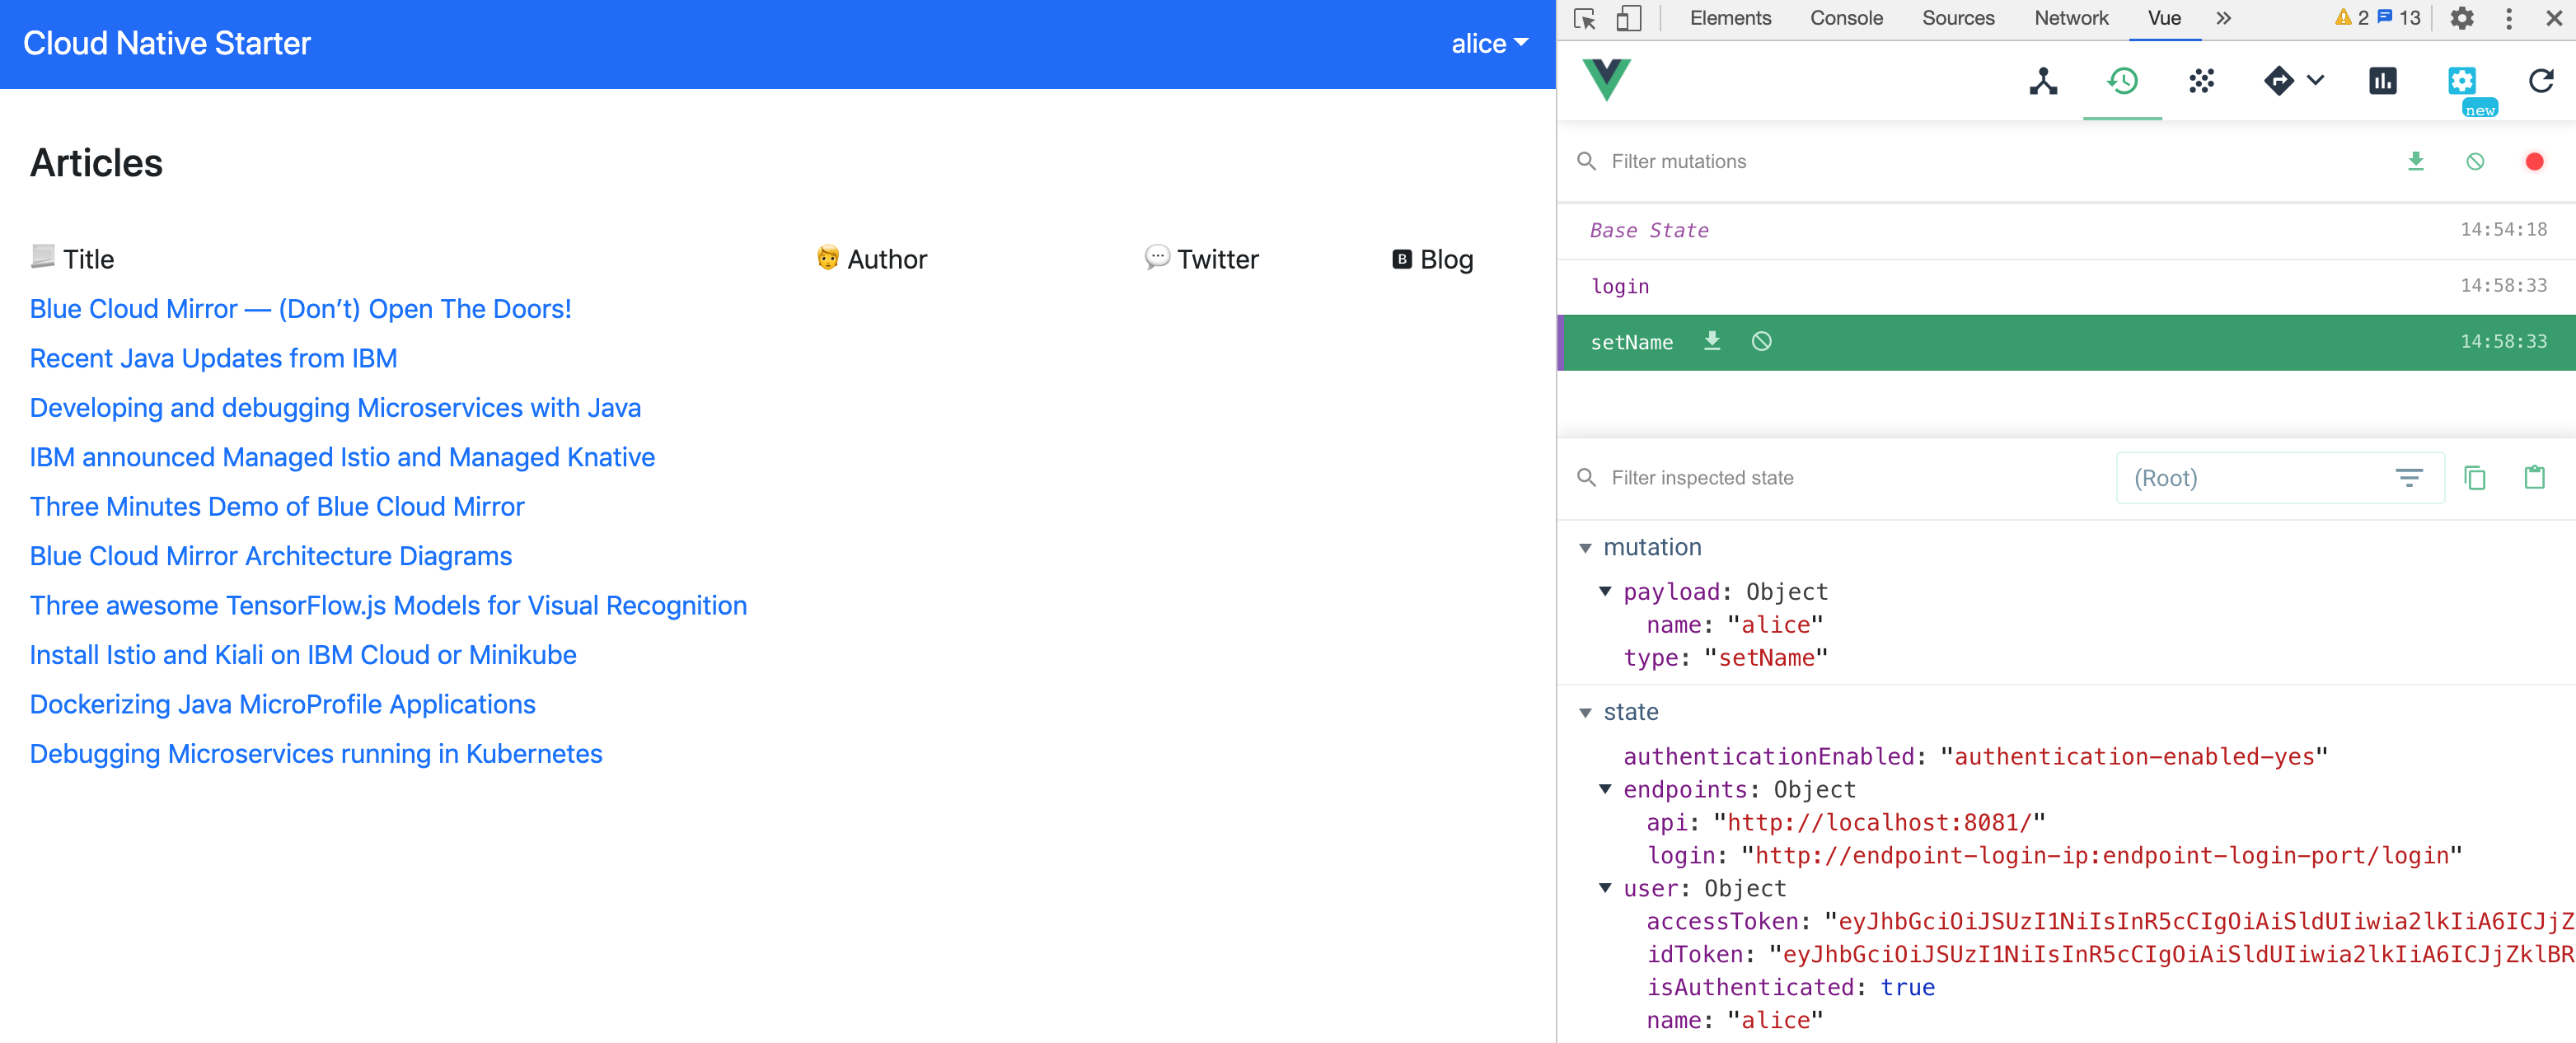
As you see in the image below the Vuex store saves access token, id token and user name. When the tokens expire, new tokens are requested via the refresh token und the Vuex store is updated.
Continue with 9 - Authorization in Quarkus application